Hexo建站系列「二」:新建Blog及导航图标目录调整
新建博客
新建blog指令
1 | hexo new [layout] <title> |
layout 是文章的布局,默认为post,可以先不写。
title 是文章的标题,也是文件的名字,存储在source/_posts下。一般只用写 title 就好
1 | hexo new "创建一篇文章" |
参考:https://blog.csdn.net/weixin_43931358/article/details/108627559
需要注意的是这里的网页地址实际是对应的那个md的文件名,和title无关,但是hexo新建页面的指令会把两个同名。手动改就好。
然后打开 对应的 md 文件,添加 tags 和类别
1 | tags: |
然后是关于 layout 的布局的问题
可以在命令中指定文章的布局(layout),默认为 post,可以通过修改 _config.yml 中的 default_layout 参数来指定默认布局。
layout是什么?layout的意思是布局,hexo博客安装成功后,在默认的根部录下,有一个scaffolds文件夹,里面有个 3 个文件,分别是draft.md,page.md,post.md。这 3 个文件就是默认的 layout 。Hexo 有三种默认布局:post、page 和 draft。在创建这三种不同类型的文件时,它们将会被保存到不同的路径;而您自定义的其他布局和 post 相同,都将储存到 source/_posts 文件夹。
要改就直接去修改对应的配置文件就好
假设我们想要写一篇名为 myBlog 的博客,如果输入完整的命令的话,应该是: hexo new post "myBlog"。但是因为默认情况下,我们的 layout 就是post,所以我们可以将 post 省略掉,写为 hexo new "myBlog" 。又因为我们的博客名字中没有空格,因此可以将省略号去掉,写为hexo new myBlog。这个命令已经是简化到不能再简化的命令了。
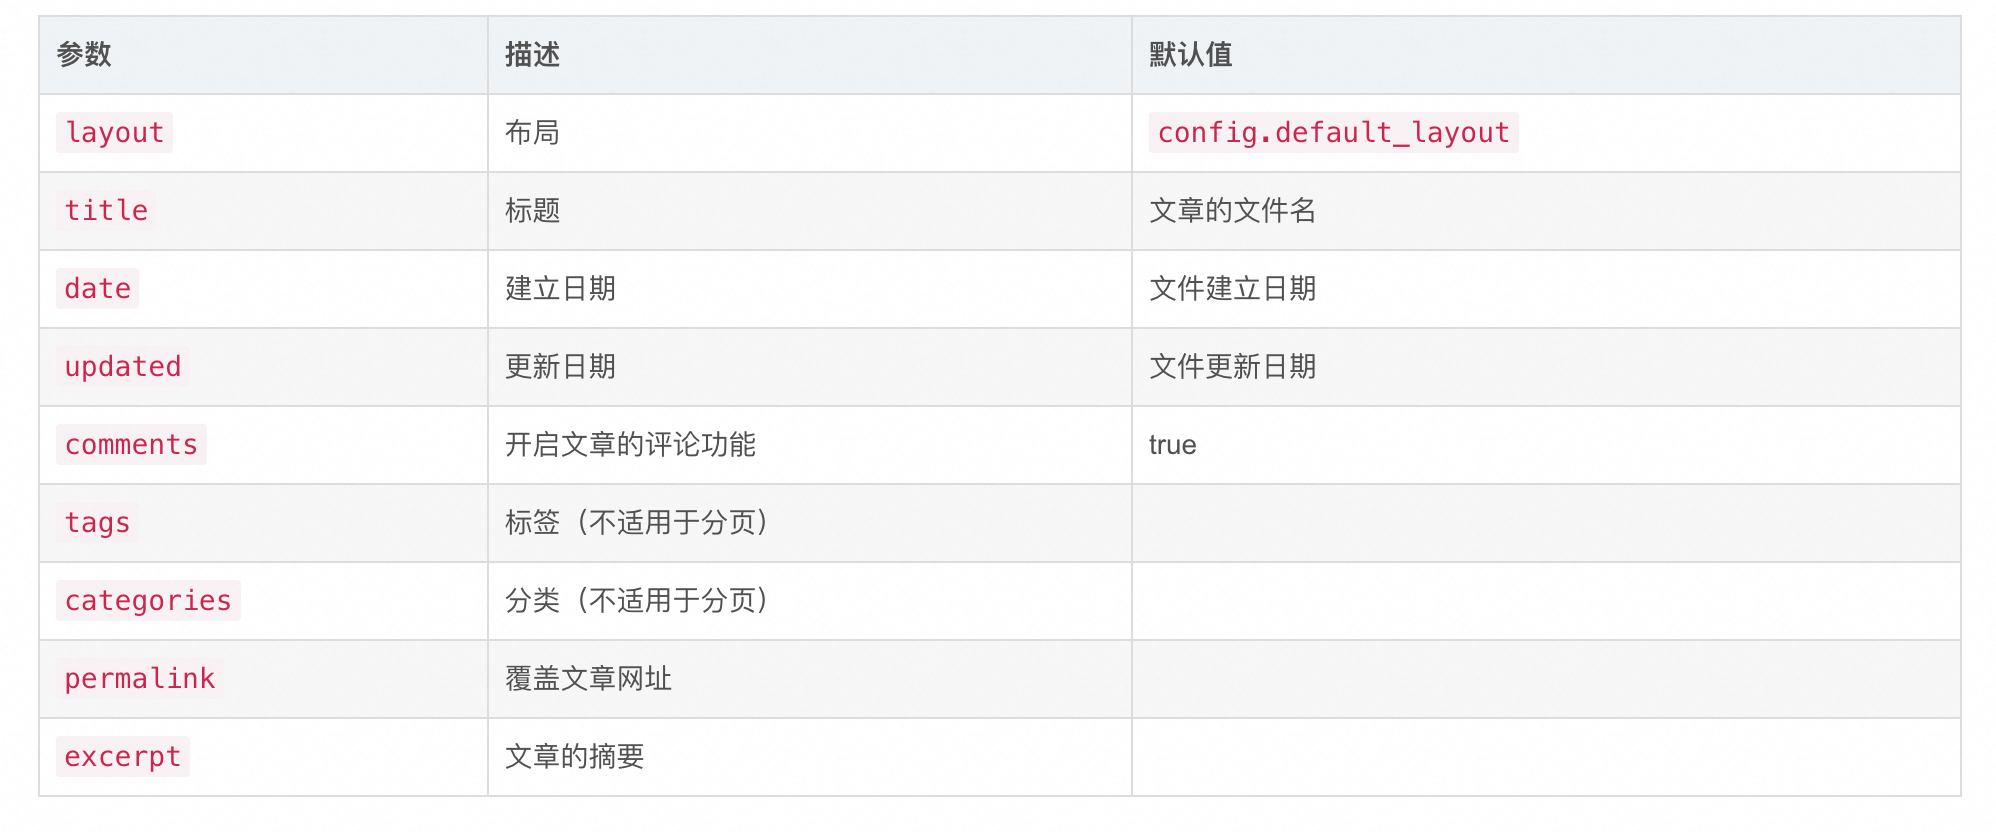
剩下的一些参数如下
以及 在文章中需要截断的地方加入:
1 | <!--more--> |
首页就会显示这条指令以上的所有内容,隐藏接下来的所有内容。
再次提醒,应该尽量把md文件名用英文,因为这会显示在网址上
Pages导航设置
修改scaffolds中的page样板
1 | title: {{ title }} |
其中,title表示默认的标题,即关于,标签,分类,归档,其type也是相应的,date会自动获取当前时间,而comments设置为false的原因是,这些界面不需要评论窗口。
创建pages
1 | hexo new page categories |
设置配置文件
在hexo的主题配置文件中设置menu参数,注意这里是 theme/next/_config.yml ,不是根目录的配置文件:
1 | menu: |
注意这里双竖线后的是图标使用,这里的 fa 实际指的是 Font Awesome 图标库。
图标美化相关
添加头像
编辑主题「NexT」的 _config.yml,修改字段 avatar, 的url值设置成头像的链接地址。
其中,头像的链接地址可以是:
1.完整的互联网 URL
2.站点内的地址,例如:
/uploads/avatar.jpg需要将你的头像图片放置在站点的source/uploads/(可能需要新建uploads目录)/images/avatar.jpg需要将你的头像图片放置在主题的source/images/目录下。
1 | avatar: |
修改网站图标
在/themes/next/_config.yml中修改成自己的图标
1 | favicon: |
文章添加目录
这个让我稍微困扰了一下,首先 首页默认是不会展示目录的, 得点进文章里面才会有目录
front-matter修改
文章的front-matter(头部)加入以下的YAML语句即可
1 |
|
toc 这个就是目录,但如果主题配置文件【比如next】默认开启了,那么可加可不加,它都会有目录
toc 的样式相关配置可以在 themes/next/_config.yml 里看到
当然也可以直接加到scaffolds文件夹下对应的模版下,这样每次创建页面时就是默认加上了
custom文件调整
然后就是倍感困惑的目录样式调整问题了
一些攻略都说文章目录样式文件custom.styl文件位于themes/next/source/css/_custom
但是实际上新版的 next 样式已经没有这个文件夹了
现在使用自定义CSS的办法: 在next下的_config.yml或next.yml中,设置
1 | custom_file_path: |
然后,将自定义CSS放进source/_data/styles.styl文件中即可
注意这里的_data文件夹要自己建,然后就是按照攻略文档里的改写了
1 | //文章目录默认展开 |
文章目录字体大小调整
1 | .post-toc ol { |
这个攻略是完整且正确的 https://alex-mcavoy.github.io/hexo/3ad659cd.html
配置文件设置
可以在主题配置里设置是否显示序号 「number」
1 | toc: |